LiFe cell internal resistance

Basically I’m after a test similar to the YR1035 battery internal resistance meter. Any suggestions, comments are appreciated, Thnx!
Comments
-
A very handy way of calculating resistance:
- V=I*R
- R=V/I
- R = "delta V" / "delta I" <=corrected to "I" current
- (3.60 - 3.55) V / (20-10) A = 0.005 Ohms = 5 mOhms (battery should be roughly in the 0.005 to 0.015 Ohm range???)
If you want to find some power resistors... Say you want 5% vs 10% load on cell (just round numbers--You probably want to test around your planned/actual loads):- 280 AH * 0.10 load * 3.7 volts (full?) = 103.6 Watt rated power resistor
- 280 AH * 0.10 load = 28 Amps
- R=V/I= 3.70 volts / 28 Amps = 0.132 Ohms for 10% rate of discharge
http://www.interfacebus.com/AWG-table-of-different-wire-gauge-resistance.html- 1 Ohm per 1,000 feet * 0.132 Ohms needed = 0.132 of 1,000 feet = 132 feet of 10 AWG cable
Or you can get an electronic load:
https://www.amazon.com/s?k=electronic+load+DC+battery&ref=nb_sb_noss
You have to go through the specifications and reviews to find what you want... This one is close (down to 4.0 volts, but review said tested single Li Ion cell)...
https://www.amazon.com/Electronic-Adjustable-Constant-Current-Capacity/dp/B083V42CTY
Lots of choices out there...
-Bill
Near San Francisco California: 3.5kWatt Grid Tied Solar power system+small backup genset -
...much appreciated Bill! I’m going over the info.Rich
-
You are very welcome Rich...
By the way, notice I had a typo in the 3rd equation. Was supposed to be "delta I", not delta "R"... Equation fixed.
By the way, "delta" is the change in something--In this case, the change in voltage over the change in current.
-BillNear San Francisco California: 3.5kWatt Grid Tied Solar power system+small backup genset -
Hi Bill, I’ve been AWOL consumed by other projects but now back to Solar. ...working on (and learning about) a wire schematic and will post. Maybe you (or anybody) can critique and offer opinions, suggestions. I hope to get this system online soon! Thnx a lot, Rich
-
 ...finally drafted a wire diagram. Thnx for reviewing and your thoughts, it’ll help me a lot!
 -
Update. the wire diagram is out of date after receiving more information, I’ll post a final draft when it’s all said and done.
-
Just as an FYI... Check the location of the "Shunt 500 A 75mv". Most shuts are installed in the negative lead from battery bus "-" connection to system "-" connection (and chassis ground, etc.). Normally, they are not installed on the + lead of the battery bus (you get into "sense lead" issues--now they need to be protected against short circuit with a fuse/breaker/resistor against a short circuit to ground because they are now at +24 VDC).
Also, need to finish connecting the negative bus of the Li Ion battery bank wiring schematic.
And from your other question in the RV Grounding discussion, you want the AC Neutral bus to be NOT be connected to RV chassis ground (AC inverter has internal transfer switch to shore power which manages N+G ground bonding).
-BillNear San Francisco California: 3.5kWatt Grid Tied Solar power system+small backup genset -
Great. Yeah I questioned the monitor manufacturer about the shunt on the positive leg and he said it’s by design. But I’ll double check! And what’s your opinion of grounding the RV array (2 panels)?...will post a new wire draft after changes. Thnx
-
I'm not sure what battery monitor @Suntrekker is using, but I am aware of some LiFePO4 monitor manufacturers that put the shunt on the positive leg. For example, the Thornwave Labs Powermon-5s is a really nifty unit, but to my surprise they do everything on the positive leg.Off-grid cabin: 6 x Canadian Solar CSK-280M PV panels, Schneider XW-MPPT60-150 Charge Controller, Schneider CSW4024 Inverter/Charger, Schneider SCP, 8S (25.6V), 230Ah Eve LiFePO4 battery in a custom insulated and heated case.
-
The +/- leads to/from the solar panels should be ungrounded.
The solar panel frames--Grounding them with a "Green" or bare copper wire to frame/chassis/battery negative ground is done to prevent energizing the frames if there is a a short from solar to frame/mounting. You do not need grounding for operation--Just for safety.
Do you rely on your mounting hardware (panel frame to racking, racking to RV roof, etc.)? If the RV is a steel skinned vehicle (like a delivery van)--You have better connections. If if this is an aluminum skinned RV (trailer, etc.)--Those have poor "frame grounds". If you have a plastic skinned RV--Then obviously no grounding... Running a green wire from panel/racking to vehicle ground--The best way to go.
If you have "tilting" frame of some sort (more RV folks are starting to do the tilting frames--Works for better farther north/winter time harvest). You want wire grounding to prevent current flow through "bearings"... Current flow (short circuit, other leakage current) can quickly ruin pivot bearings).
-BillNear San Francisco California: 3.5kWatt Grid Tied Solar power system+small backup genset -
Good to know! Any suggestion on ground wire awg? I’m thinking 14 or 12 stranded. ThnxBB. said:...If you have "tilting" frame of some sort (more RV folks are starting to do the tilting frames--Works for better farther north/winter time harvest). You want wire grounding to prevent current flow through "bearings"... Current flow (short circuit, other leakage current) can quickly ruin pivot bearings).
-Bill
@Horsefly. Yes, I have the PowerMon. -
12 or 14 AWG is fine for 20 amps or 15 amps of current flow--As long as the wire capacity exceeds the solar panel output current.
If this was for protecting against lightning strike--I would be suggesting 6 AWG minimum in theory.
-BillNear San Francisco California: 3.5kWatt Grid Tied Solar power system+small backup genset -
Great! Lightening strike prevention interests me though there’s no guarantee.Now that the wire diagram is pretty much done, I am focusing on the battery and will need help along the way, thnx! For starters the 8 cells have VOC readings of 3.299 and 3.302 and I want to passively equalize the voltages (while waiting for parts). Does connecting 8 cells in parallel possibly achieve this goal or what do you suggest?

-
If you are worried about lightning, these Midnite Surge Suppressors are some of the best out there for this job:Hopefully, Mcgivor will drop by and discuss balancing your battery bank.Usually "top balancing" is done for solar systems (hold batteries at 3.600 volts until near zero current flow) with an Li Ion compatible charger.... Note that a small charger with large AH cells--It can take days or longer to bring the bank up to 3.600 volts from a partial charge.It also depends on exactly what BMS you are using... Some are just voltage monitors--Others can actively balance the cells.-Bill
Near San Francisco California: 3.5kWatt Grid Tied Solar power system+small backup genset -
Connecting in parallel will ballance the cells, however they would be middle ballanced without either dischargeing for bottom balancing or charging for top ballancing. Typically botom is utilized for EV applications, top for solar, rationale being EV is high demand where range is priority, using the lower regon of capacity more frequently and solar is the opposite.Suntrekker said:Great! Lightening strike prevention interests me though there’s no guarantee.Now that the wire diagram is pretty much done, I am focusing on the battery and will need help along the way, thnx! For starters the 8 cells have VOC readings of 3.299 and 3.302 and I want to passively equalize the voltages (while waiting for parts). Does connecting 8 cells in parallel possibly achieve this goal or what do you suggest?
Being middle ballanced would likely results in a single cells voltage drifting as it approaches both top and bottom, reducing overall capacity due to the BMS cutting the load when a single cell is out of parameter with the others. Logic may suggest having them both top as well as bottom ballanced would be optimal, however this can't be done, it's on or the other.
To achieve top ballance either a programmable power supply or a single cell charger can be used, the charger is a simple procedure of connecting and waiting for a week or so, depending on current output, until it turns itself off, connection of the charge leads being placed diagonally opposite rather than at one end.
1500W, 6× Schutten 250W Poly panels , Schneider MPPT 60 150 CC, Schneider SW 2524 inverter, 400Ah LFP 24V nominal battery with Battery Bodyguard BMS
Second system 1890W 3 × 300W No name brand poly, 3×330 Sunsolar Poly panels, Morningstar TS 60 PWM controller, no name 2000W inverter 400Ah LFP 24V nominal battery with Daly BMS, used for water pumping and day time air conditioning.
5Kw Yanmar clone single cylinder air cooled diesel generator for rare emergency charging and welding. -
Yes, I’m leaning towards bottom balance because of a 10-85% SOC range. Of course feedback is important.
And the system is without a BMS (though controversial) but the circuitry has protection. I just don’t trust an inexpensive BMS but that’s me.
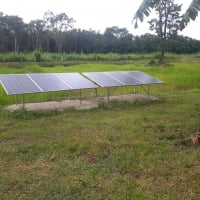
In the meantime I’ll passive balance the cells (in parallel) and study bottom (top) balancing...sure to have questions. And attached is a revised wire diagram, suggestions always appreciated. Thank you Bill and mcgivor!

-
The choice of where to balance should be determined by where the battery will spend the majority of its time, 10% SOC is on the lower end, most recommendations use the 20% to 90% window, between the knees of the charge/discharge profile.
I suppose it wouldn't make much difference where the ballancing is performed if the charging, along with the dischargeing, is protected by cutoff settings, however this is a risk one needs to consider without a BMS. Most commercially available controllers or inverters use a sum total voltage with a 100 mV resolution, which is pretty vague considering a BMS monitors individual cell voltages at 1 mV resolution and the higher the nominal voltage the larger the potential of having a single cell drift outside it's safe limitations.
Choose what you may, it's your equipment, your opinions are yours, my opinions are mine, if you don't like what I'm saying, that's fine, but just remember to keep an open mind, because a person who fails to listen is blind.1500W, 6× Schutten 250W Poly panels , Schneider MPPT 60 150 CC, Schneider SW 2524 inverter, 400Ah LFP 24V nominal battery with Battery Bodyguard BMS
Second system 1890W 3 × 300W No name brand poly, 3×330 Sunsolar Poly panels, Morningstar TS 60 PWM controller, no name 2000W inverter 400Ah LFP 24V nominal battery with Daly BMS, used for water pumping and day time air conditioning.
5Kw Yanmar clone single cylinder air cooled diesel generator for rare emergency charging and welding. -
For solar applications, I really think top balancing is the way to go. If you size all the components right, your battery pack will likely reach "full" (where full may be around 90%-95%) almost every day. You will reach the bottom of your intended range - maybe 10% - only on some rare occasions. If you balance your cells at the top, they will nominally stay balanced at that top end. If you balance somewhere else (middle or bottom), then there is a pretty good chance that one cell will be a "runner" and the BMS will disconnect the pack when that cell reaches the high voltage cutoff.
I've read dozens of write-ups on balancing cells for solar, and I don't think I've read more than one or two that recommended something other that top-balancing.Off-grid cabin: 6 x Canadian Solar CSK-280M PV panels, Schneider XW-MPPT60-150 Charge Controller, Schneider CSW4024 Inverter/Charger, Schneider SCP, 8S (25.6V), 230Ah Eve LiFePO4 battery in a custom insulated and heated case. -
mcgivor said:The choice of where to balance should be determined by where the battery will spend the majority of its time, 10% SOC is on the lower end, most recommendations use the 20% to 90% window, between the knees of the charge/discharge profile.
I suppose it wouldn't make much difference where the ballancing is performed if the charging, along with the dischargeing, is protected by cutoff settings, however this is a risk one needs to consider without a BMS. Most commercially available controllers or inverters use a sum total voltage with a 100 mV resolution, which is pretty vague considering a BMS monitors individual cell voltages at 1 mV resolution and the higher the nominal voltage the larger the potential of having a single cell drift outside it's safe limitations.
Choose what you may, it's your equipment, your opinions are yours, my opinions are mine, if you don't like what I'm saying, that's fine, but just remember to keep an open mind, because a person who fails to listen is blind.Understood, thnx. And the expertise offered by forum members is very much appreciated!
-
@Horsefly. Thnx for the info!
-
I’m making busbars out of 110 copper and read about “slotting the hole” for better conductivity. Can someone explain this more in detail; how to cut lines in copper, at what depth and is it common practice?
-
Can you give us a link to "slotting the hole"?
This sounds almost like controlling "skin depth" current distribution in conductors--Generally connected with AC power:
https://en.wikipedia.org/wiki/Skin_effect
And the context of "Litz" wire add braided cables to make the most efficient use of the copper cross section:
https://en.wikipedia.org/wiki/Litz_wire
The above applies to "AC" power/current (alternating current).
In theory, does not apply to DC constant current applications... HOWEVER, I have always wondered if "skin effect" may apply to our DC input for AC inverters... The input current is generally a "sine squared" current wave form (sort of a sine wave or rounded pulse train--Current peaks when AC voltage/current peaks, and drops to near zero when AC sine wave crosses zero voltage).
-BillNear San Francisco California: 3.5kWatt Grid Tied Solar power system+small backup genset -
"skin effect" happens well past 120hz on many inverter and battery wires, there is nothing to be gained.
https://www.powerstream.com/Wire_Size.htm
skin effect on a #2 solid starts at 410 hz, on OOOO starts at 125hz
Powerfab top of pole PV mount | Listeroid 6/1 w/st5 gen head | XW6048 inverter/chgr | Iota 48V/15A charger | Morningstar 60A MPPT | 48V, 800A NiFe Battery (in series)| 15, Evergreen 205w "12V" PV array on pole | Midnight ePanel | Grundfos 10 SO5-9 with 3 wire Franklin Electric motor (1/2hp 240V 1ph ) on a timer for 3 hr noontime run - Runs off PV ||
|| Midnight Classic 200 | 10, Evergreen 200w in a 160VOC array ||
|| VEC1093 12V Charger | Maha C401 aa/aaa Charger | SureSine | Sunsaver MPPT 15A
solar: http://tinyurl.com/LMR-Solar
gen: http://tinyurl.com/LMR-Lister , -
BB. said:Can you give us a link to "slotting the hole”?
-BillHere you go, you’re better at interpreting this PDF.
Excerpts-
“The paper discusses how introducing a slotted hole shape for the bolts in bolted busbar connections increases significantly the true contact area and reduces contact resistance.
The new slotted hole shape arises from [3] where
longitudinal slots of width 3-4mm and length 50mm are
introduced between the buses holes in order to expand
the true contact area.”
A question, what’s the easiest way to cut slots and is it worth the time.
https://www.researchgate.net/publication/237770786_Bolted_Busbar_Connections_with_Slotted_Bolt_Holes
-
The introduction begins with reference to high power distribution, this is not something found in the typical small scale solar system, whilst interesting, it would likely be of no practical use, in my opinion.1500W, 6× Schutten 250W Poly panels , Schneider MPPT 60 150 CC, Schneider SW 2524 inverter, 400Ah LFP 24V nominal battery with Battery Bodyguard BMS
Second system 1890W 3 × 300W No name brand poly, 3×330 Sunsolar Poly panels, Morningstar TS 60 PWM controller, no name 2000W inverter 400Ah LFP 24V nominal battery with Daly BMS, used for water pumping and day time air conditioning.
5Kw Yanmar clone single cylinder air cooled diesel generator for rare emergency charging and welding. -
I’m amazed 8 cells equalized voltage in an hour, before 3.299 to 3.302 volts...now 3.301 (70% SOC). Next bottom balance prior to installation.


-
Good to know.mcgivor said:The introduction begins with reference to high power distribution, this is not something found in the typical small scale solar system, whilst interesting, it would likely be of no practical use, in my opinion. -
Be extremely careful when discharging, especially as the cells approach terminal voltage of 2.500V, use a smaller load at that to minimize current, things can happen extremely fast so do not leave unattended. What are you using as a load? When discharging I used 6V automotive lamps in parallel which could be shed to reduce current, although I didn't use this for bottom balancing.
The cells were actually fairly close at 3 mV hense the short time taken to stabilize.1500W, 6× Schutten 250W Poly panels , Schneider MPPT 60 150 CC, Schneider SW 2524 inverter, 400Ah LFP 24V nominal battery with Battery Bodyguard BMS
Second system 1890W 3 × 300W No name brand poly, 3×330 Sunsolar Poly panels, Morningstar TS 60 PWM controller, no name 2000W inverter 400Ah LFP 24V nominal battery with Daly BMS, used for water pumping and day time air conditioning.
5Kw Yanmar clone single cylinder air cooled diesel generator for rare emergency charging and welding. -
Great. I read (for my application) to discharge 280AH cells individually to an equal low voltage then combine them and charge. I have a DC power supply providing CV and CC. 6V auto lamps to discharge sounds good. Can you describe your setup; number of lamps, total wattage, approx time to discharge? Thnx
-
When bottom balancing all the cells would be connected in parallel and discharged to 2.500V, subsequent charging would be done in series however care must be taken to prevent a single cell from spiking as the difference in capacity will be revealed as they approach the knee in the charging profile.
To prevent a runaway cell limit the voltage to around 3.450 VPC or 27.6V, perhaps less as you plan on not utilizing a BMS, the individual cell voltage spikes happen in fractions of a second, faster than can be monitored manually, even with multiple meters. For this reason top ballancing with a low voltage disconnect at 20%SOC is a simpler way to operate, naturally a personal opinion.
The 6V automotive lamps I used were 21W, I used sockets to facilitate easy removal to adjust the load, but it must be noted I was only dischargeing individual cells, perhaps a high power rheostat would be a better alternative but the lamps were easier to obtain in my particular case.
Using a light load is recommended to allow minor differences to slowly adjust, it's the reverse in top ballancing, using low current especially as the knee approaches, my 3200Ah bank took close to 2 weeks using a single cell charger, don't attempt to rush things, patience will pay dividends.
Personally I wouldn't bottom ballance nor operate without a BMS, but to each their own.
1500W, 6× Schutten 250W Poly panels , Schneider MPPT 60 150 CC, Schneider SW 2524 inverter, 400Ah LFP 24V nominal battery with Battery Bodyguard BMS
Second system 1890W 3 × 300W No name brand poly, 3×330 Sunsolar Poly panels, Morningstar TS 60 PWM controller, no name 2000W inverter 400Ah LFP 24V nominal battery with Daly BMS, used for water pumping and day time air conditioning.
5Kw Yanmar clone single cylinder air cooled diesel generator for rare emergency charging and welding.

Categories
- All Categories
- 233 Forum & Website
- 141 Solar Forum News and Announcements
- 1.4K Solar News, Reviews, & Product Announcements
- 200 Solar Information links & sources, event announcements
- 900 Solar Product Reviews & Opinions
- 256 Solar Skeptics, Hype, & Scams Corner
- 22.5K Solar Electric Power, Wind Power & Balance of System
- 3.5K General Solar Power Topics
- 6.7K Solar Beginners Corner
- 1K PV Installers Forum - NEC, Wiring, Installation
- 2.1K Advanced Solar Electric Technical Forum
- 5.6K Off Grid Solar & Battery Systems
- 430 Caravan, Recreational Vehicle, and Marine Power Systems
- 1.1K Grid Tie and Grid Interactive Systems
- 656 Solar Water Pumping
- 817 Wind Power Generation
- 624 Energy Use & Conservation
- 624 Discussion Forums/Café
- 316 In the Weeds--Member's Choice
- 75 Construction
- 125 New Battery Technologies
- 108 Old Battery Tech Discussions
- 3.8K Solar News - Automatic Feed
- 3.8K Solar Energy News RSS Feed