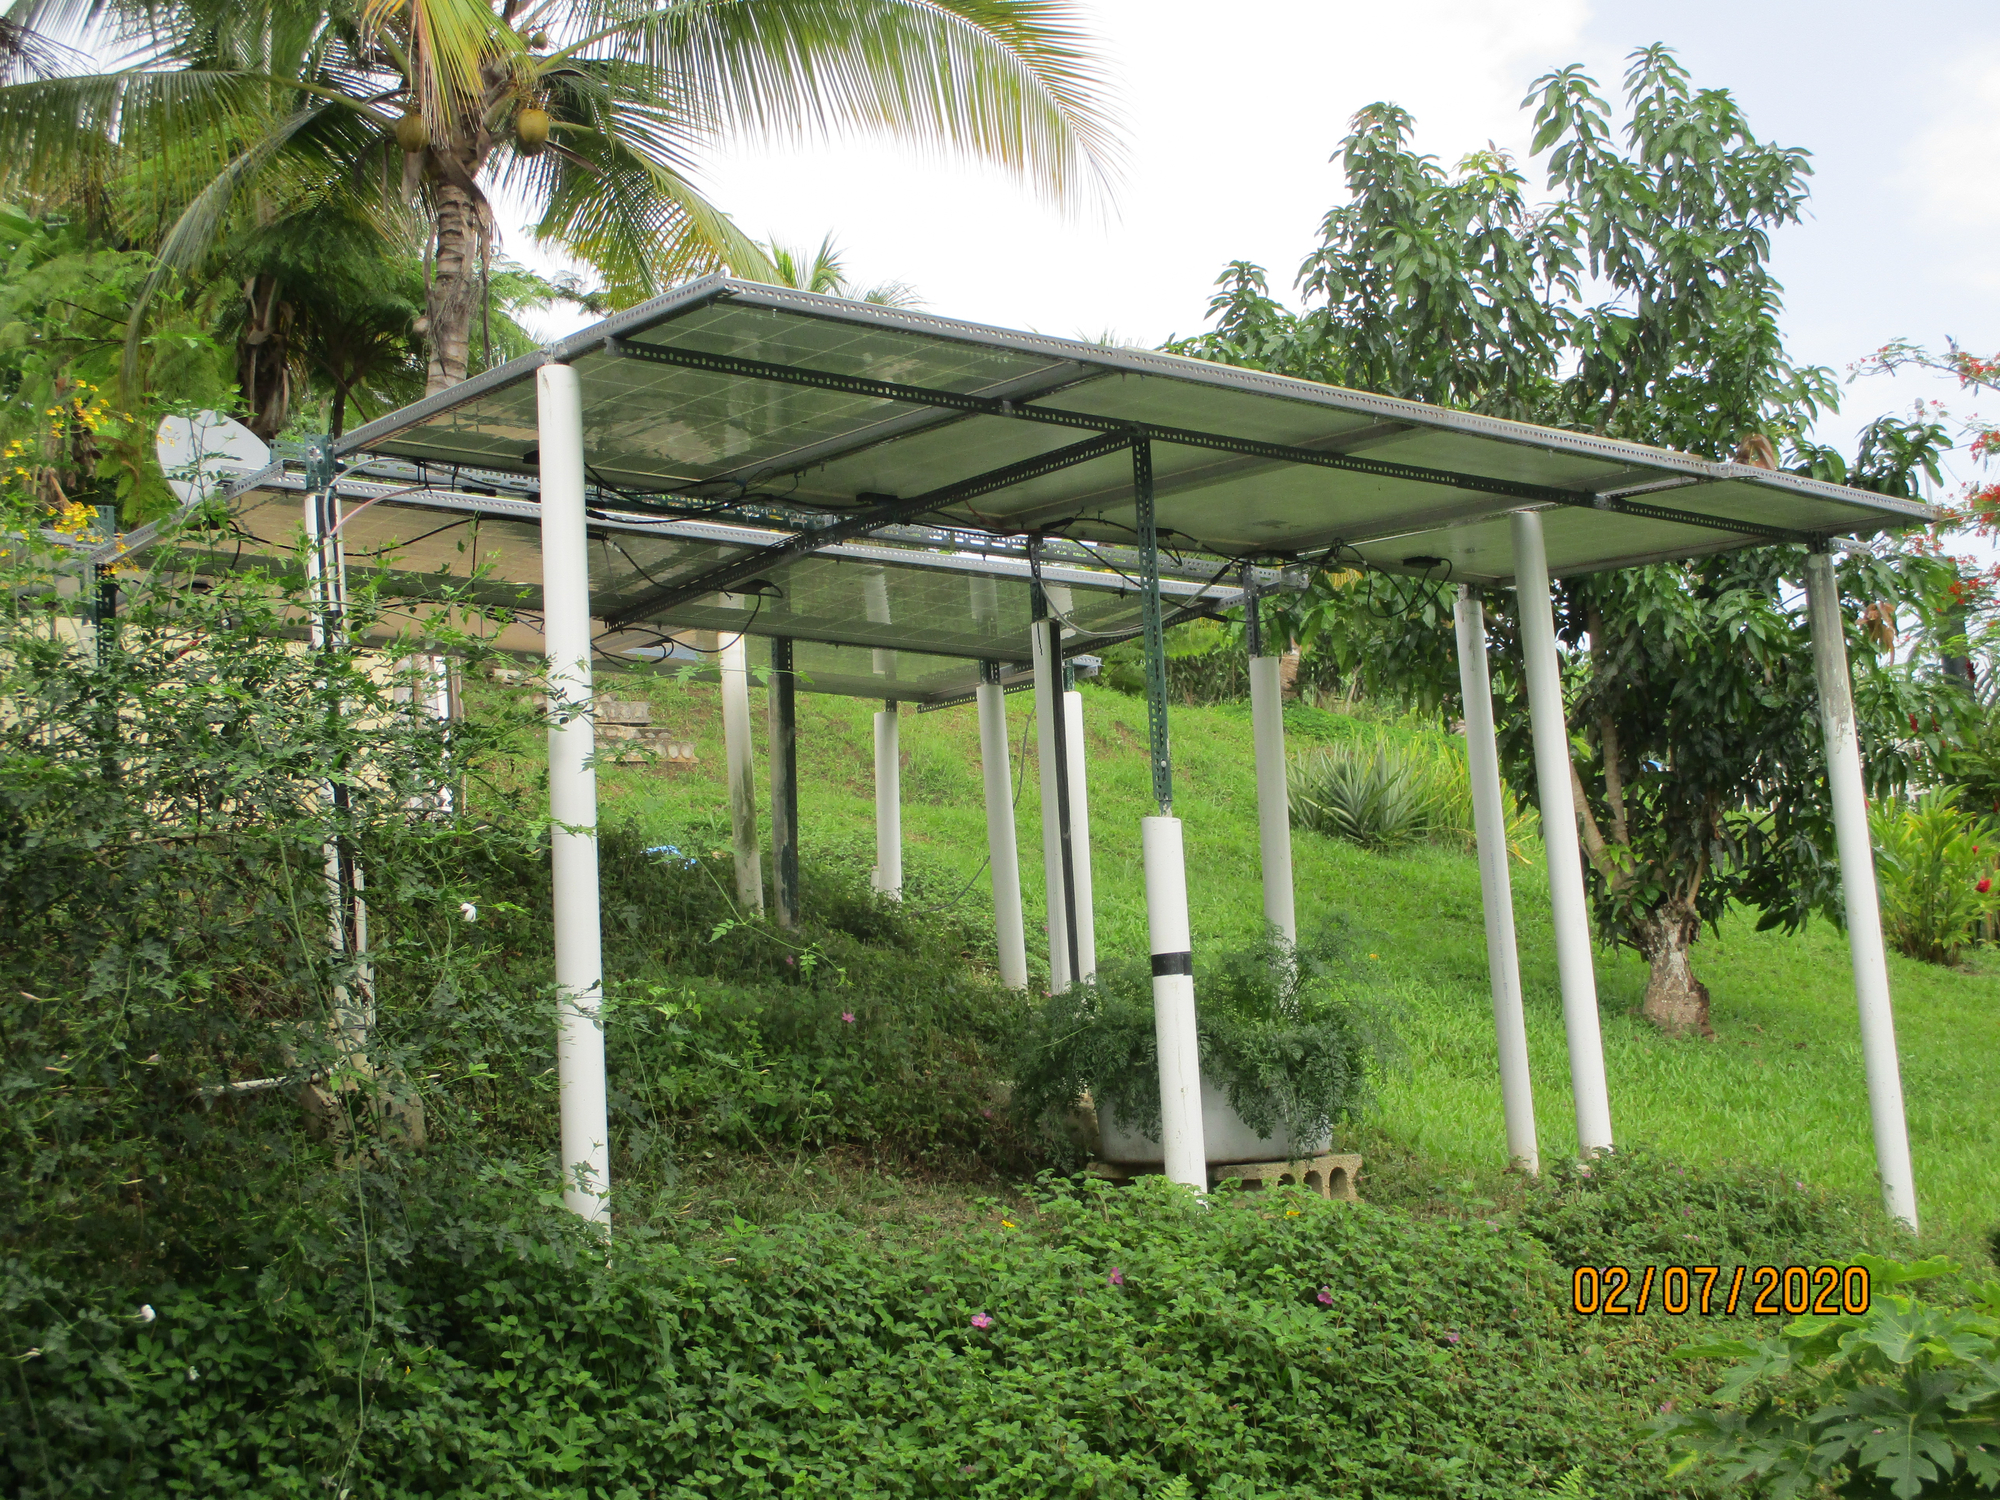
This panel mounting worked

hillside
Registered Users Posts: 157 ✭✭
Just wanted to post this mounting method for what it's worth. At my
location the panels need only a slight angle. I didn't want to put them
on the roof, 1) because I don't like heights, (it's a 2 story), 2) it's
hurricane country, it rains a lot and the less holes you put in your
roof the better, 3) in late winter thru early Spring the sun would be on
the wrong side of the south facing roof.
So I came up with 2-1/2" x 1-5/8" perforated angle iron mounted in thin wall sanitary 3" PVC pipe.
Our
soil has a high clay content so I used a square cutting shovel to dig
pyramid shaped holes and set the PVC posts in cement (with rock) and
1/2" or 3/8" rebar inside the angle iron tied with wire.
Posts were filled to the top with cement.
It was actually fun to build and was easy to reconfigure when I added more panels.
1/4"
and 5/16" galvanized bolts and washers secured thru the perforated
steel made it easy to assemble. Spray bolts with lithium grease. Had to drill a few holes in the side of
panels where I couldn't access the undersides.
It has
worked well and stood up to Hurricane Maria....winds weren't clocked
accurately as all measuring devices were destroyed but were anywhere
from 100mph to 130 mph.


8- 235Watt panels, 2 strings in series/parallel, 4 Rolls, 235 AH FLA. batteries, 1800 W.Xantrex pure sine inverter, SRNE ML2440 40Amp Controller & 40 Amp Renogy controller, 24 Volt system.
5 stand alone PV arrays; 12V gate opener, 24V Dankoff rain water pumping system, 12V Shurflo rain water garden pumping, 12V bathroom lighting and fan.
4- 450 Watt panels with 4 Rolls 235 AH 6 volt batts./ 2-Renogy Tracer 40 Amp controllers/ Xantrex 1800W PSW Inverter.
4- 450 Watt panels with 4 Rolls 235 AH 6 volt batts./ 2-Renogy Tracer 40 Amp controllers/ Xantrex 1800W PSW Inverter.
Honda EU3000W generator for backup.
Categories
- All Categories
- 233 Forum & Website
- 140 Solar Forum News and Announcements
- 1.3K Solar News, Reviews, & Product Announcements
- 181 Solar Information links & sources, event announcements
- 895 Solar Product Reviews & Opinions
- 252 Solar Skeptics, Hype, & Scams Corner
- 22.5K Solar Electric Power, Wind Power & Balance of System
- 3.5K General Solar Power Topics
- 6.7K Solar Beginners Corner
- 1K PV Installers Forum - NEC, Wiring, Installation
- 2.1K Advanced Solar Electric Technical Forum
- 5.6K Off Grid Solar & Battery Systems
- 428 Caravan, Recreational Vehicle, and Marine Power Systems
- 1.1K Grid Tie and Grid Interactive Systems
- 656 Solar Water Pumping
- 816 Wind Power Generation
- 621 Energy Use & Conservation
- 623 Discussion Forums/Café
- 316 In the Weeds--Member's Choice
- 74 Construction
- 125 New Battery Technologies
- 108 Old Battery Tech Discussions
- 3.8K Solar News - Automatic Feed
- 3.8K Solar Energy News RSS Feed